
以前ISP1507ピッチ変換基板とJ-Linkをつなぐという記事を書きました。J-Linkというハードウェアを使ってISP1507 ピッチ変換基板にプログラムを書き込む方法の紹介でした。手順としては問題ないのですが、J-Linkが結構高価(4万円くらい)するので簡単に手が出ないのが惜しいところです。
そこで、スイッチサイエンスでも販売しているBumpyという書き込み用のハードウェアを使って書き込む方法を紹介します。
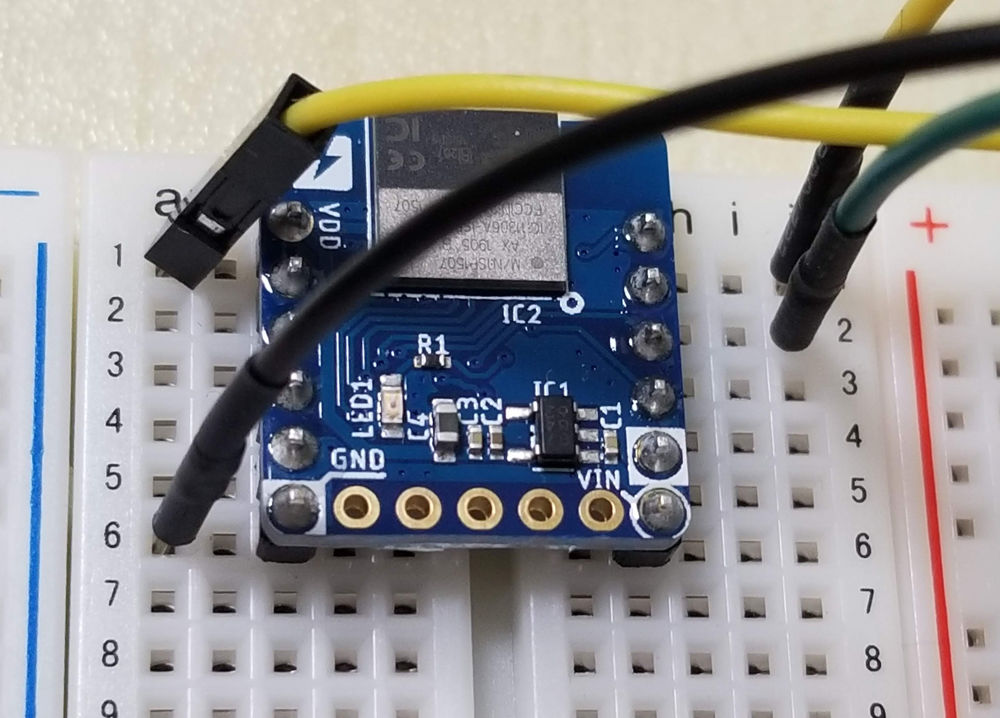
ピン配置と出力
ISP1507ピッチ変換基板とBumpyのピン配置はこんなです。
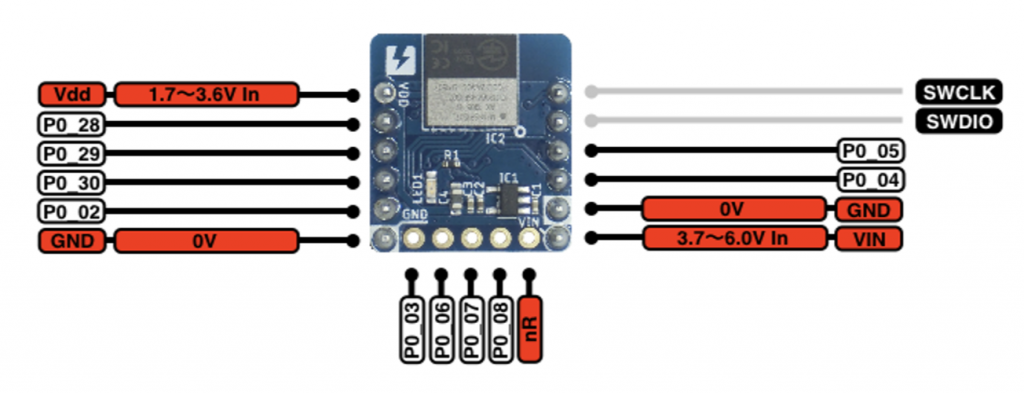
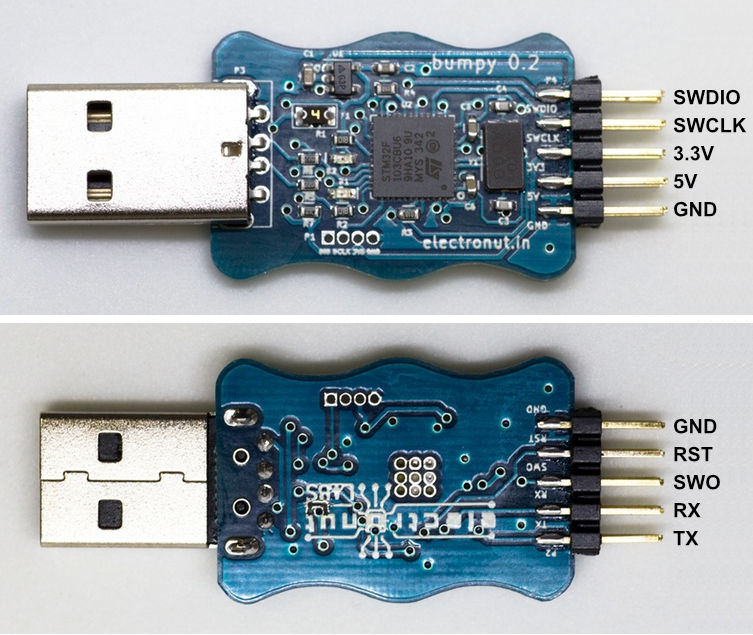
この中で必要なのは4本です。
- SWDIO - SWDIO
- SWCLK - SWCLK
- Vdd - 3.3V
- GND - GND
GDBの準備
書き込みにはGDB(The GNU Project Debugger)を使います。GNU Arm Embedded Toolchain Downloadsからダウンロードできますが、pathの設定など面倒なのでMacの人はHomebrewからインストールするほうがいいでしょう。
brew tap ArmMbed/homebrew-formulae
brew install arm-none-eabi-gcc
GDBで接続
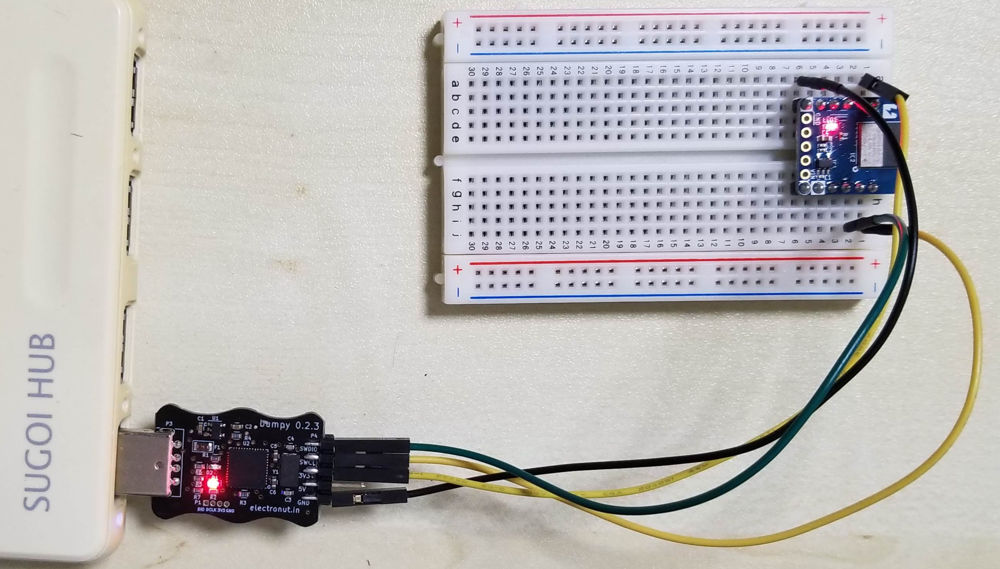
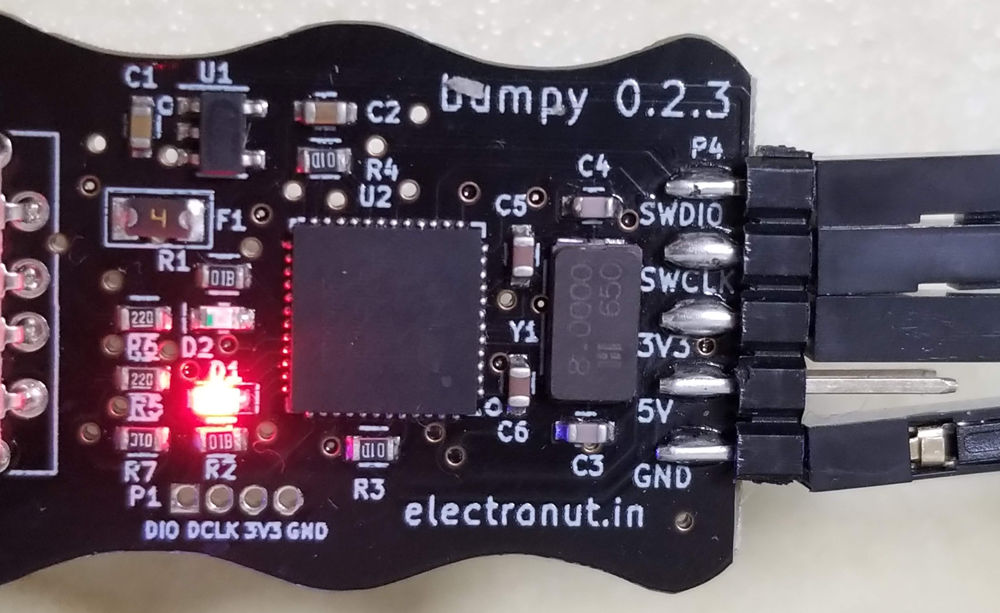
さて、GDBの用意ができたらつなぎましょう。BumpyはUSBのAタイプコネクタ直付けなのでUSBハブを介してつなぎました。
GDBを起動する前にBumpyがなんという名前でシリアルポートとして見えているかを確認しておきます。
$ ls /dev/cu.u*
/dev/cu.usbmodemC1D9ADED1  /dev/cu.usbserial-DA00X6NU
/dev/cu.usbmodemC1D9ADED3
Bumpyは/dev/cu.usbmodem〜として見えるので、ここでは/dev/cu.usbmodemC1D9ADED1を使ってBumpyとGDBを接続します。
GDBを起動し、
$ arm-none-eabi-gdb
 GNU gdb (GNU Tools for Arm Embedded Processors 9-2019-q4-major) 8.3.0.20190709-git
 Copyright (C) 2019 Free Software Foundation, Inc.
 License GPLv3+: GNU GPL version 3 or later http://gnu.org/licenses/gpl.html
 This is free software: you are free to change and redistribute it.
 There is NO WARRANTY, to the extent permitted by law.
 Type "show copying" and "show warranty" for details.
 This GDB was configured as "--host=x86_64-apple-darwin10 --target=arm-none-eabi".
 Type "show configuration" for configuration details.
 For bug reporting instructions, please see:
 http://www.gnu.org/software/gdb/bugs/.
 Find the GDB manual and other documentation resources online at:
     http://www.gnu.org/software/gdb/documentation/.
 For help, type "help".
 Type "apropos word" to search for commands related to "word".
 (gdb)
target extended-remoteコマンドを使って接続しました。
(gdb) target extended-remote /dev/cu.usbmodemC1D9ADED1
 Remote debugging using /dev/cu.usbmodemC1D9ADED1
つながったら、monitor swdp_scanコマンドでつながっているデバイスを探して、attachコマンドで接続します。
(gdb) monitor swdp_scan
Target voltage: unknown
Available Targets:
No. Att Driver
 1      Nordic nRF52
 2      Nordic nRF52 Access Port
(gdb) attach 1
Attaching to Remote target
 warning: No executable has been specified and target does not support
 determining executable automatically.  Try using the "file" command.
書き込み
あとはloadコマンドでelfファイルを指定すれば書き込めます。今回はお試しでisp1507_LLSS.elfというLEDを光らせるプログラムを書き込みました。
(gdb) load isp1507_LLSS.elf
 Loading section .vectors, size 0x200 lma 0x0
 Loading section .init.nrf52_errata_12, size 0x90 lma 0x200
 Loading section .init.nrf52_errata_31, size 0x90 lma 0x290
 Loading section .init.nrf52_errata_36, size 0x90 lma 0x320
 Loading section .init.nrf52_errata_66, size 0x90 lma 0x3b0
 Loading section .init.nrf52_errata_108, size 0x90 lma 0x440
 Loading section .init.nrf52_errata_136, size 0x90 lma 0x4d0
 Loading section .init.nrf52_errata_182, size 0x64 lma 0x560
 Loading section .init, size 0x64 lma 0x5c4
 Loading section .init, size 0x44 lma 0x628
 Loading section .init, size 0x18 lma 0x66c
 Loading section .init.nrf52_errata_16, size 0x66 lma 0x684
 Loading section .init.SystemInit, size 0x2c2 lma 0x6ea
 Loading section .init.nrf52_errata_32, size 0x66 lma 0x9ac
 Loading section .init.nrf52_errata_37, size 0x66 lma 0xa14
 Loading section .init.nrf52_errata_57, size 0x66 lma 0xa7c
 Loading section .init.SystemCoreClockUpdate, size 0x14 lma 0xae2
 Loading section .text.main, size 0x160 lma 0xaf6
 Loading section .segger.init.table, size 0x14 lma 0xc58
 Loading section .segger.init.data, size 0x4 lma 0xc6c
 Loading section .segger.init.__SEGGER_init_copy, size 0x1a lma 0xc70
 Start address 0x628, load size 3204
 Transfer rate: 23 KB/sec, 152 bytes/write.
終わったらquitでGDBを終了します。このままだとプログラムが動作しないので一度USBハブから外してまた取り付ければ、書き込んだプログラムが動作します。
なんだかいちいち面倒くさい感じですが、コマンド一発でできるようなやり方がBumpyの元になったBlackMagic ProbeのWiki内GDB Automationにあるので、参考にしてみてください。
追記
コマンドというかシェルスクリプトで書き込みができたので載せておきます。
!/bin/sh
 DEV=$(ls -1 /dev/cu.usbmodem* | head -n1)
 arm-none-eabi-gdb  -nx --batch \
   -ex "target extended-remote $DEV" \
   -ex 'monitor swdp_scan' \
   -ex 'attach 1' \
   -ex 'load' \
   -ex 'compare-sections' \
   -ex 'kill' \
   $1
このスクリプトの引数にelfファイルを指定すれば書き込みが完了します。
例 : nRFwrite.sh isp1507test.elf
DEV=$(ls -1 /dev/cu.usbmodem* | head -n1) のところで書き込むデバイスを指定しています。一番番号の若いデバイスと接続しに行きますので、他のデバイス(USB-シリアル変換ICなど)は外しておくことをおすすめします。
さらに追記
この後、WindowsでもGDBを使って書き込むことができました。やることは同じで、違いはtarget extended-remoteのシリアルポートの指定がCOMxになるところくらいです。
この方法でAdafruitが公開しているArduino Core for Adafruit Bluefruit nRF52 Boards のファームウェアを書き込むとArduino IDEで開発できるようになります(要USBシリアル変換基板)。